I've been noticing lately that my make-up brushes have gotten pretty gross. They are full of make-up and grime....yuck! I've also recently learned that letting old make-up build up in your brushes can cause pimples and even allergies.
To search for some great tips, I turned to Pinterest and was hooked up to this website full of great tips! This means that I cannot take credit for this picture or the following information:
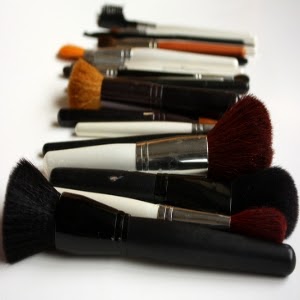
3 great ways to clean the make-up brushes:
1. Use shampoo. You can use a more gentle shampoo such as baby wash. You can also add 2-3 drops of tea tree oil to intensify the anti-bacterial properties.
2. Another option is to use alcohol. Fill up a spray bottle with 99% alcohol and spray it on the brush. Wipe clean with a paper towel.
3. A third option is to make a solution with 1 cup of oil-free makeup remover, 1 cup of mild facial cleanser, and 3 cups of water. Dunk and swirl your brushes in this solution for three minutes. Rinse under running water and wipe dry.
Showing posts with label beauty. Show all posts
Wednesday, April 17, 2013
Monday, April 15, 2013
A Nail Polish Trick to Make it Last Longer
I love to paint my nails. This really makes me sound like a "girly girl" and I don't care. It's fun to sport different colors to coordinate with my outfits. I use nail polish as an accessory and have quite the collection going.
The worst is when nail polish starts chipping off. I can't stand the way it looks and I've tried about every top coat on the market to prevent it from happening. I turned to Pinterest for some ideas and inspiration and I came across this fantastic idea. Take a bottle of vinegar and dip a cotton ball in it. Swipe it over the un-painted nail and allow it to dry. Apply the nail polish as you normally would. I still recommend a topcoat to ensure it's longevity. Let me know your results!
Labels:
beauty,
cotton ball,
nail polish,
nail polish trick,
pinterest,
vinegar
Friday, April 5, 2013
Natural Baking Soda Blackhead Remover
Blackheads are the worst. They are stubborn and terribly ugly. They annoy me so badly, that I am willing to do almost anything to get rid of them. I have tried those Biore pore strips and they don't really work that well for me.
Since I have been into the natural DIY beauty products lately, I decided to try out this DIY blackhead scrub. I figured it was worth a shot since I had both ingredients in my home already. I tried it out, and I love it! The lactic acid in the milk and the acid-neutralizing alkalinity in baking soda clears out the pores and slightly exfoliates.
Take 1 tbsp of baking soda and 1/4 cup of milk and mix well. Rub this into blackhead prone areas, rinse and repeat as needed.
Labels:
baking soda,
beauty,
blackhead,
DIY beauty,
milk
Sunday, March 24, 2013
Another DIY Face Scrub
A face scrub is something that will help to exfoliate the dry skin away. It makes my skin super soft and supple. Take 1 tsp baking soda and 1/2-1 tbsp of coconut oil. Mix the ingredients well. Wash your face with warm water and apply the scrub to your face in small circular motions. Rinse off with warm water and dry.
Labels:
baking soda,
beauty,
coconut oil,
DIY face scrub
Tuesday, March 12, 2013
Hair Brushes Decoded
Does anyone else feel incredibly overwhelmed in the hair brush aisle? Or better yet, does anyone else have a constant debate over whether this is one or two words: "hairbrush" or "hair brush"? I decided on two, but PLEASE tell me if I'm wrong. Usually I'm the queen of grammar.
Anyway, I found this great visual aid on Pinterest while browsing around trying to look for some ideas on how I want to get my hair done when I go in next to see my hairstylist!
A paddle brush is a great way to start. This is a fantastic brush if you have long hair, short hair, thin hair, thick hair, etc. I usually use a hair pick when I get out of the shower to detangle, but use a brush while I'm blow drying my hair to assist in styling. It makes such a difference! Check out the other great brushes and what they are used for. You may find exactly what your hair needs and what you've been searching for.
Labels:
beauty,
hair,
hair brush,
hairstyling,
tips and tricks
Tuesday, February 26, 2013
Homemade Eye Cream
As most of you know, I'm all about using homemade and natural products. I've learned more than I wanted to about some ingredients that they put in creams and products that they sell in stores.
You need only TWO ingredients to make this fantastic eye cream and you will see so many benefits to it! It's also a lot less expensive than the creams available in the stores. Plus, you know what is in it!
Vitamin E is an essential part of skin care. It is an antioxidant (it protects the skin from UV light, pollution, drugs, and other free radicals that damage skin cells). It also plays a role in anti-aging by reducing the appearance of fine lines and wrinkles. Vitamine E also reduces stretch marks and age spots. It's practically magical!
Find a small jar (about an ounce). Fill it with coconut oil and warm it in the microwave for a couple of seconds until it is liquid. Take three vitamin E capsules and poke a hole in them to release the liquid in them and pour into the melted coconut oil. Use a toothpick to stir the mixture together and place into the refrigerator until it is solid again!
Labels:
beauty,
coconut oil,
DIY,
eye cream,
vitamin E
Friday, February 22, 2013
Use a Primer to Keep Your Foundation on All Day Long
One of the most important things to remember about foundation application is not in the actual foundation itself. Are you surprised? I sure was when I first heard this. And then I tested out this theory because I was quite surprised and shocked, and I'll admit that I didn't believe it at first.
I tried this fix and perfect primer by Rimmel at first because it's inexpensive--I got it for less than $8 at Ulta! I didn't want to try something from a department store until I knew that I liked using primer. I tried this for one week and I couldn't believe the difference as to how my face looked after a day of work, errands, and more! It even lasted all night when we went out for drinks last weekend. I love that when I use this, it looks like my foundation is fresh all night long. I topped the primer with Clinique Perfectly Real Makeup, which is the foundation that I usually use. Give the primer a try and see what you think--if you don't like it, what do you have to lose?
Labels:
beauty,
fix and perfect,
foundation,
make up,
primer
Friday, January 25, 2013
DIY Face Strips
I love to make as many beauty products at home that I can. This way, I know EXACTLY what is in the product and it's a lot less expensive to be able to make it myself.
I used to buy those Biore pore strips to clean out the pores on my nose (blackheads are disgusting and a pain in the butt). They are also super expensive! It adds up when you have to buy them twice a month. I found a DIY recipe that's super easy to make (only TWO ingredients!).
All you need is 1 tablespoon of unflavored gelatin and 2 tablespoons of milk. Mix it together in a disposable container until it gets chunky. Mix quick! Microwave the mixture for 10-15 seconds, stir quick and immediately apply it to your face! It hardens quickly, so act quickly! Put it in whatever trouble spots you have. I put it on my nose and chin. Let this dry for 15 minutes or more. Your face will be so soft when you're done!
Labels:
beauty,
biore strips,
DIY,
face strips,
homemade
Tuesday, January 15, 2013
Get Silky, Soft Legs
I found a great beauty DIY at home recipe for silky, smooth legs. I know it's not summer, but that is not to stop you from being able to have the smoothest legs ever! All you need for this leg scrub is 3 tablespoons of lemon juice, 1/2 cup oil (of your choice) and 1 1/4 cup sugar. Combine these ingredients into a medium sized bowl.
Start by soaking your legs in warm water for 5 minutes. Then shave your legs. Rub the sugar scrub all over legs and massage well. After it's been rubbed in really well, rinse your legs off. Shave again (which gets the dead skin off) and dry off legs! I always like to lotion my legs afterwards, it really locks in the moisture!
Labels:
at home,
beauty,
DIY,
ingredients,
leg scrub
Thursday, September 6, 2012
How to Marble Nails
Giving nails the "marble effect" is a hot trend in the beauty world. I found a great post on Pinterest (where else?!) and had to share! I tried it out and loved it. I have tried it now with so many different colors that people are started to ask me to do theirs for them!
First paint your nail all over with a light, shimmery color. I use an off-white, cream-colored, or light pink shade and do a base coat before putting it on. Put a GOOD amount of lotion around the nail on the finger. This will help the nail polish to stay on the nail! Fill a bowl with water and have two bottles of nail polish open and ready. Add a drop of the first nail polish to the middle of the water in the bowl. Then add the second color immediately after. Keep repeating the process until you get a nice design going in the water bowl. Use a toothpick, needle, or pin and swirl the polish around until the design looks like you want it to look on your nail.
Soak a q tip in nail polish remover and rub the excess off of your hand. Let it dry and do the other nails after!
Labels:
beauty,
marble nail polish,
nail polish,
nails,
tutorial
Subscribe to:
Comments (Atom)


